Have you ever walked into a room and felt that something was missing, even though the furniture, colors, and décor were beautiful?
Sometimes, the missing element isn’t another piece of furniture or decorative accessory. It’s architectural character.
Wall millwork is one of my favorite ways to add depth, texture, and a sense of history to a home. Whether you love a charming English cottage, a sophisticated traditional interior, or a cozy modern farmhouse, decorative wall treatments can help create a space that feels thoughtfully designed.
And here’s the good news: you don’t need an older home or an extensive renovation budget to achieve the look.
Today, we’re exploring seven beautiful millwork options, along with a DIY tutorial for creating your own picture-frame molding wall.
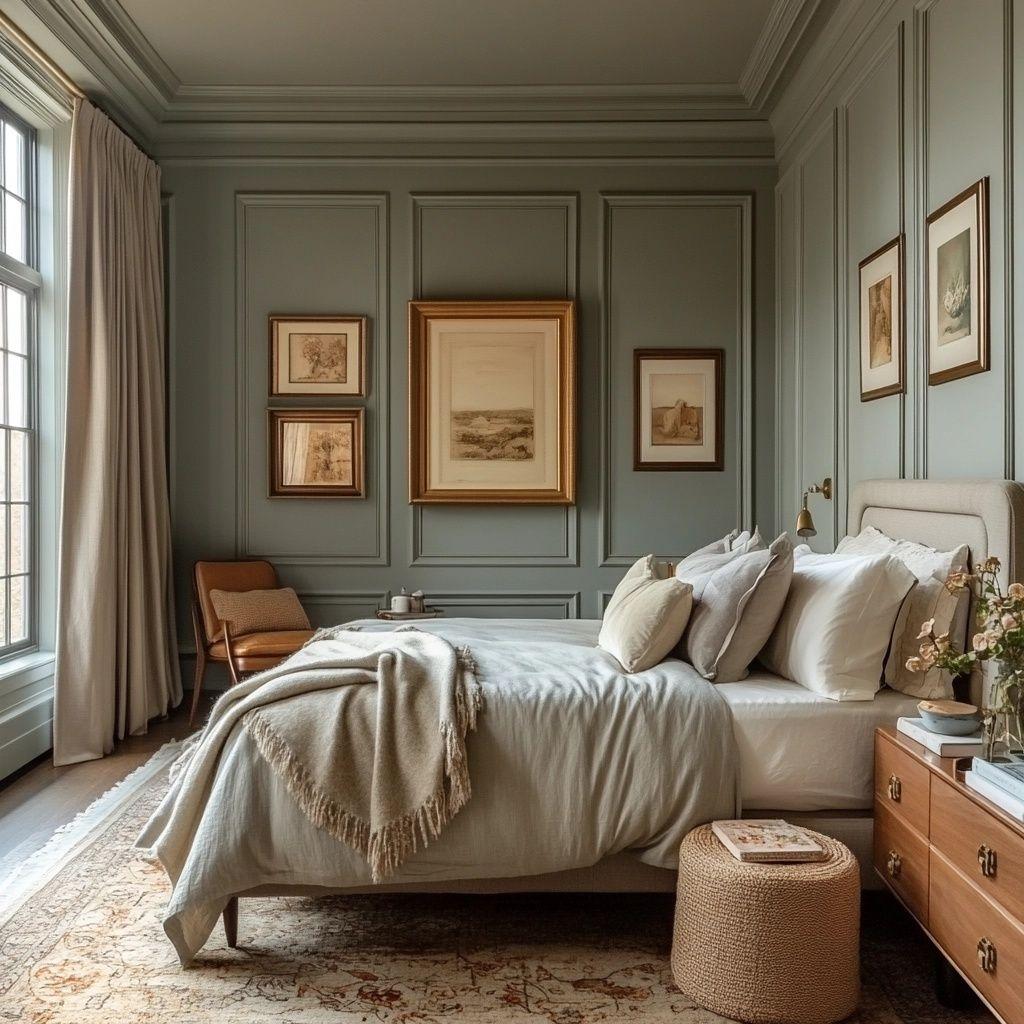
1. Picture-frame molding: Classic and elegant
Picture-frame molding is a decorative trim treatment that creates rectangular or square frames directly on your existing walls.
This style is especially beautiful in traditional, transitional, French-inspired, and vintage interiors.
Where I love using it: living rooms, dining rooms, bedrooms, and entryways.
For a subtle, sophisticated appearance, paint your molding and walls the same color. The natural shadows created by the trim will add dimension without overwhelming the space.
Designer tip: Consider adding larger panels below and smaller horizontal panels above, or use a chair rail to separate your wall into two sections. Keep the panel proportions balanced with the room’s ceiling height and furniture.
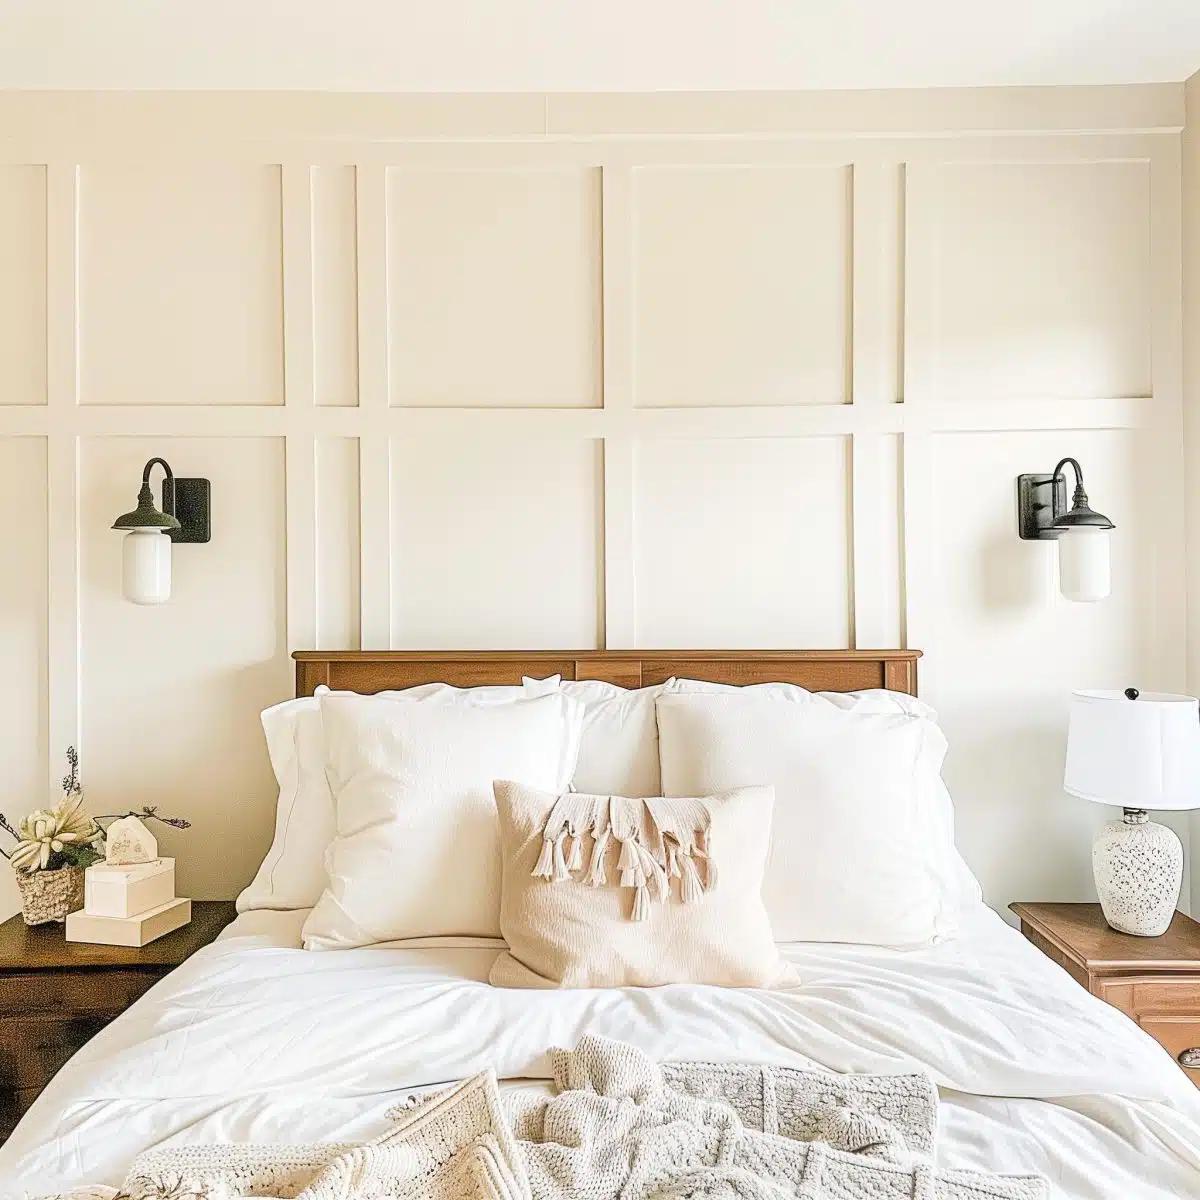
2. Board and batten: Clean lines with architectural depth
Board and batten creates a repeating pattern using wider boards and narrower battens. Interior designs often replicate its appearance with flat trim applied directly to drywall.
This style works beautifully in farmhouse, cottage, Craftsman, and transitional interiors.
It can be installed at traditional wainscoting height, approximately halfway up the wall, or extended to the ceiling.
Where I love using it: mudrooms, hallways, bedrooms, and family rooms.
Designer tip: If your home already has substantial baseboards, choose batten dimensions that complement their thickness. Avoid placing thick boards over thin baseboards without planning a clean transition.
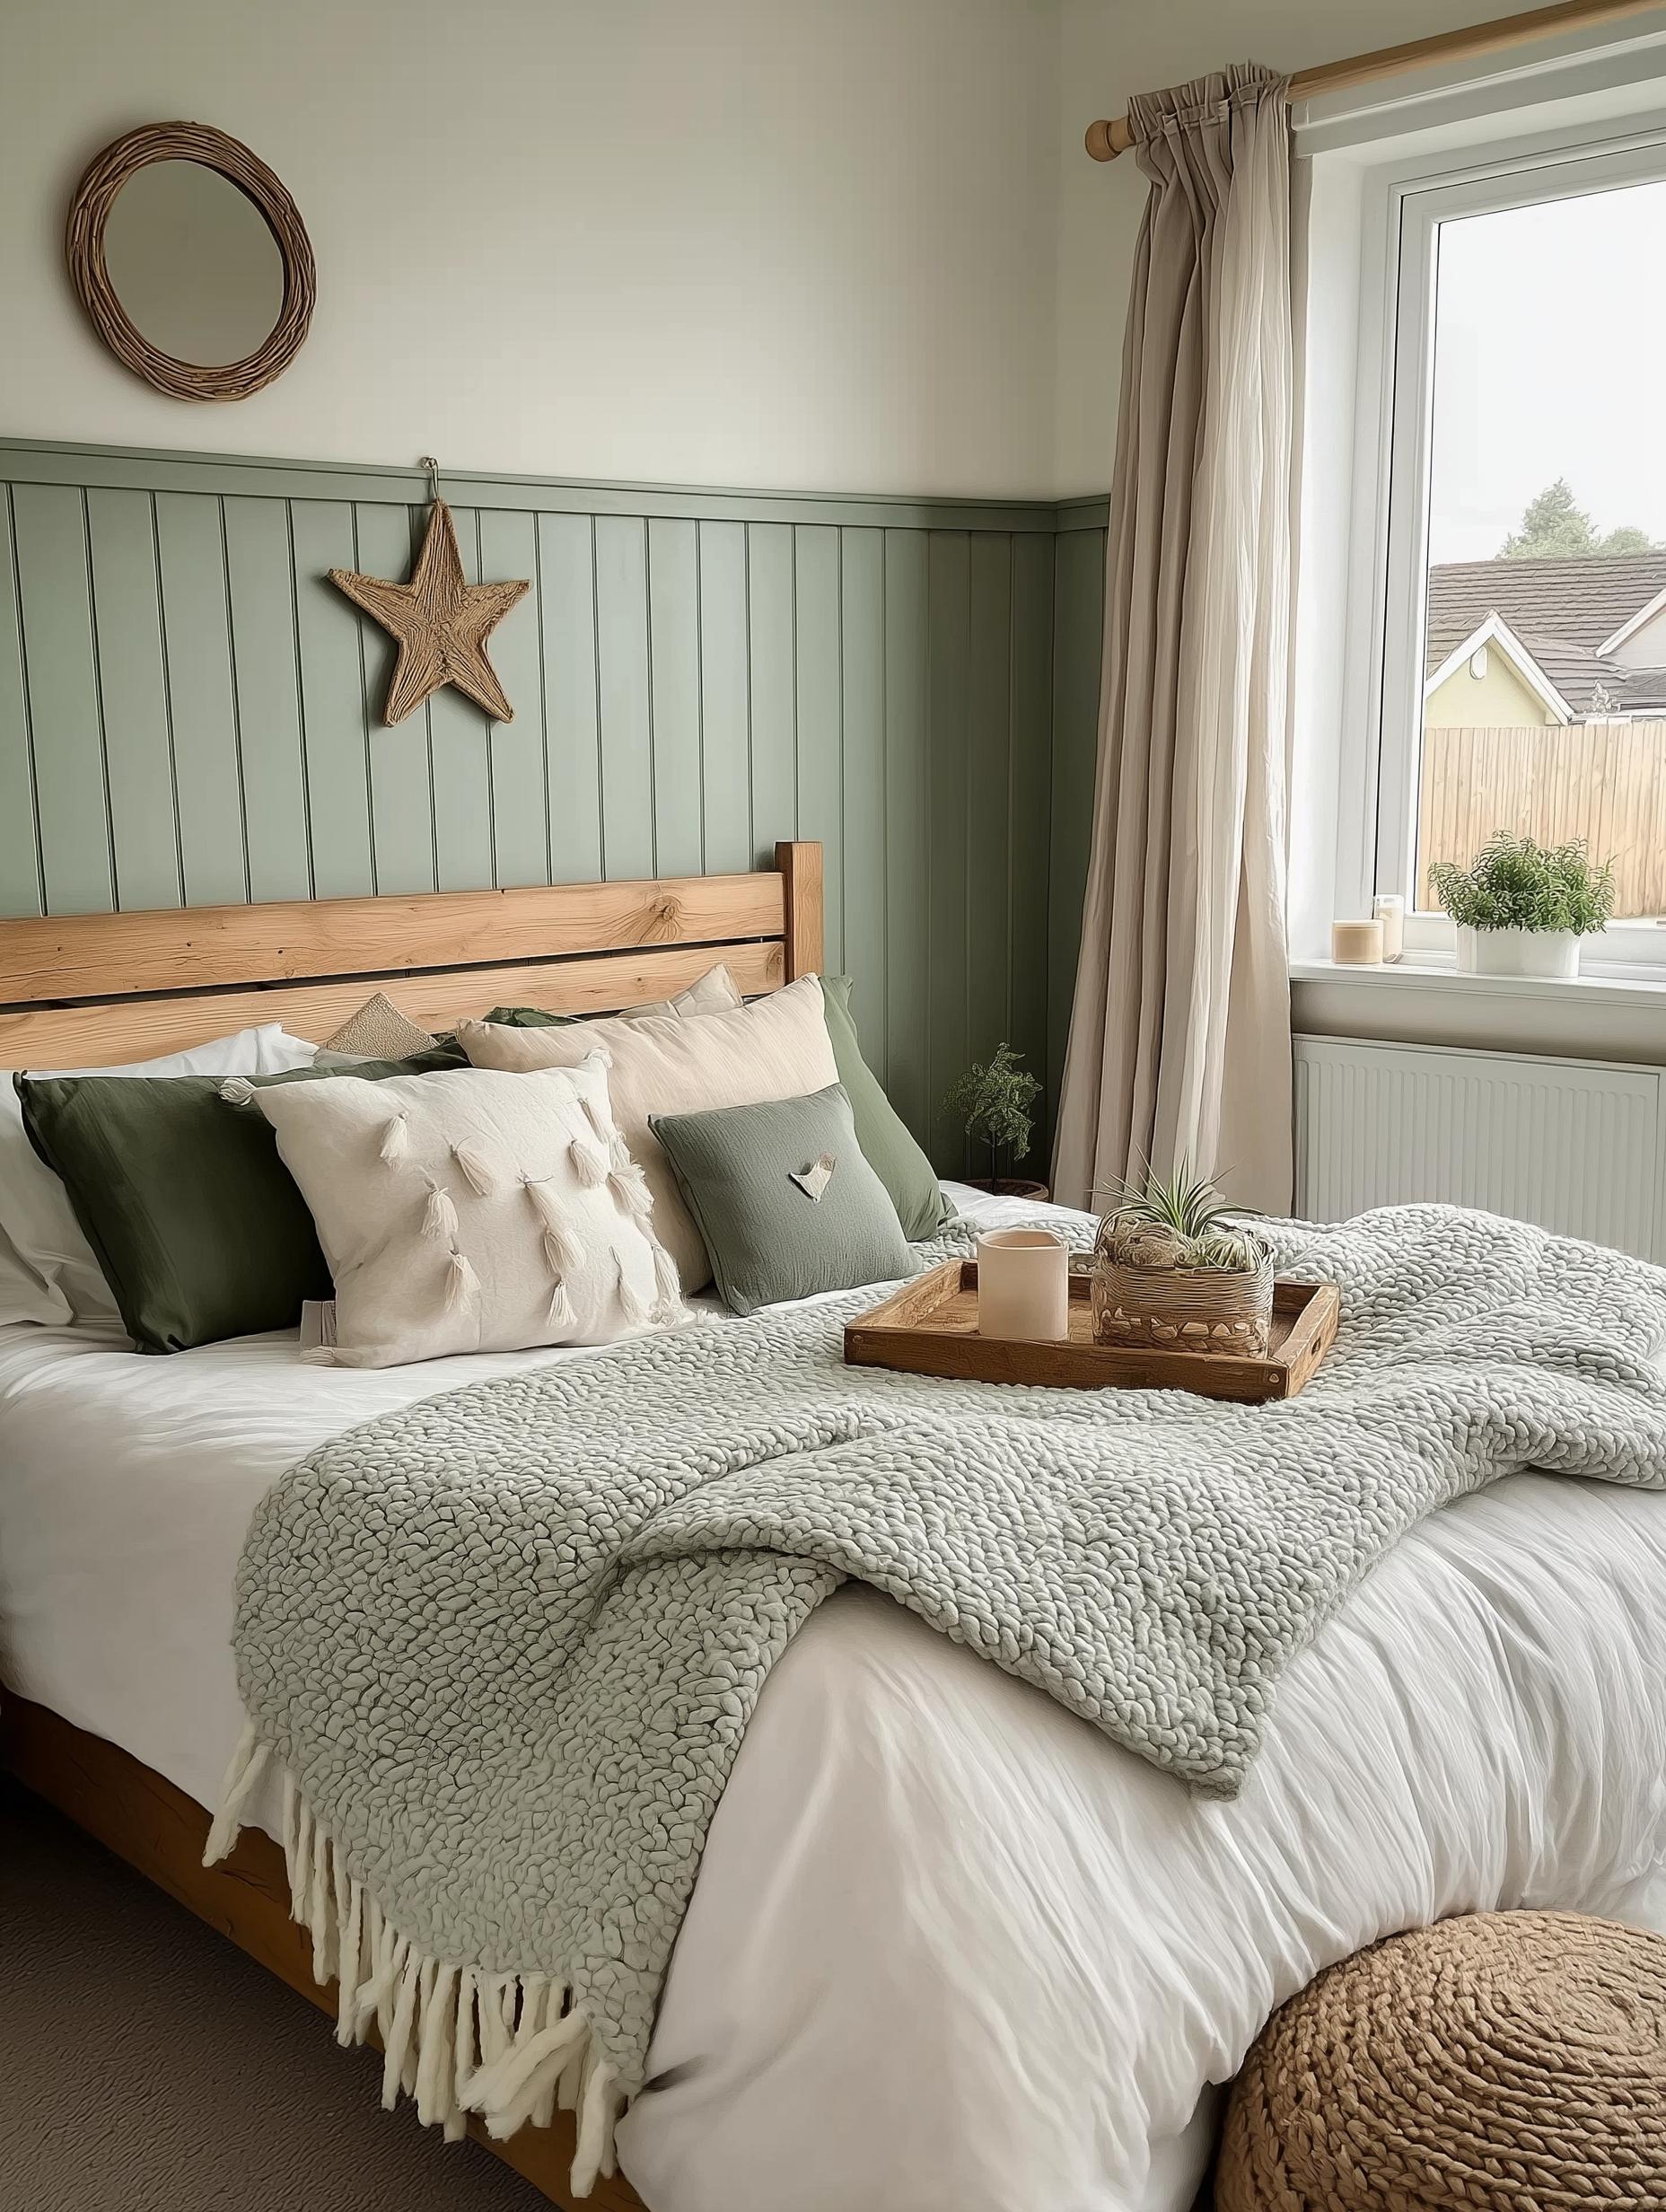
3. Beadboard: Charming cottage character
Beadboard features narrow, repeating vertical grooves that create a textured wall surface.
It brings a familiar, nostalgic quality to kitchens, bathrooms, laundry rooms, and cozy cottage interiors.
Beadboard is available in individual planks and convenient panel sheets, making it accessible for many DIY projects.
Where I love using it: breakfast nooks, bathrooms, kitchens, and laundry rooms.
Designer tip: Try painting the beadboard a muted heritage color, such as dusty blue, warm putty, or soft sage. Pair it with warm wood, unlacquered-brass-look fixtures, and vintage-inspired artwork.
In moisture-prone rooms, select materials specifically rated for the environment.
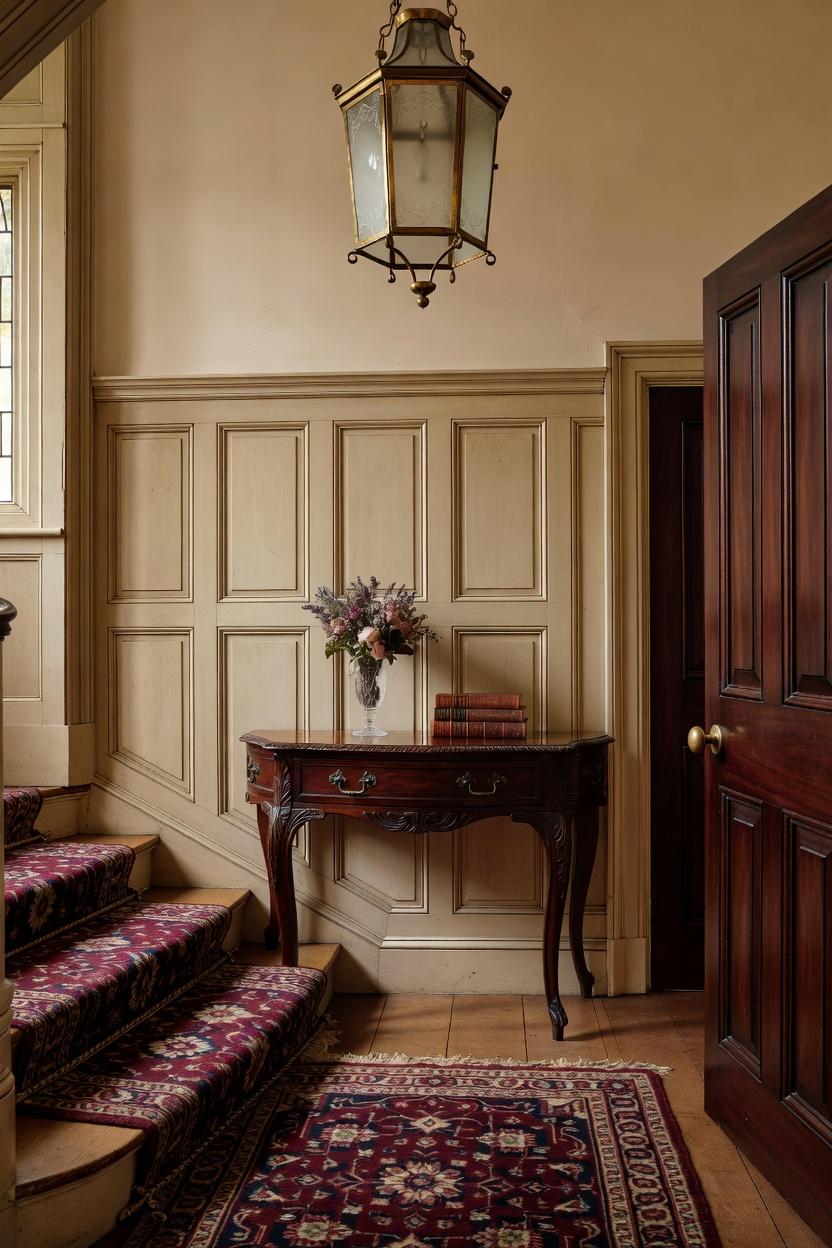
4. Traditional raised-panel wainscoting
Raised-panel wainscoting features dimensional panels surrounded by rails and stiles, creating a more substantial architectural treatment.
It has long been associated with historic homes, formal dining rooms, libraries, and traditional interiors.
Unlike simple applied picture-frame molding, true raised-panel construction uses individual shaped panels fitted within a supporting framework.
Where I love using it: formal dining rooms, stairways, libraries, and traditional entryways.
Designer tip: Pay attention to scale. Deep profiles and large panels can add beautiful richness to spacious rooms, while smaller rooms may benefit from simpler profiles.
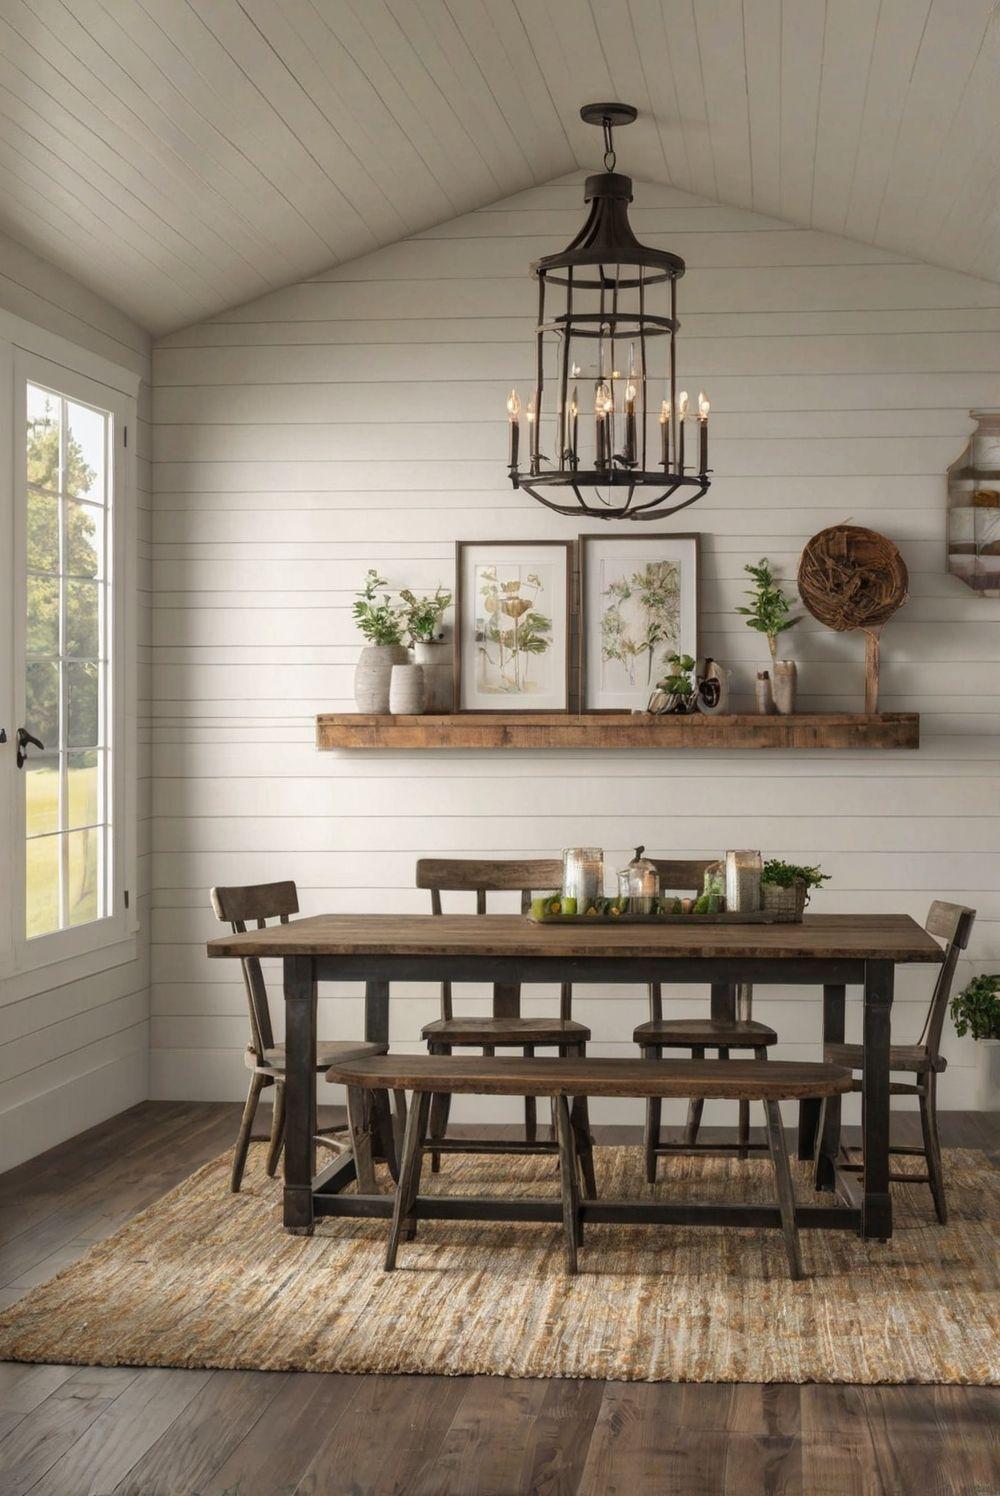
5. Shiplap: Rustic and relaxed
Shiplap uses boards with overlapping or interlocking edges that create distinctive reveal lines.
While horizontal white shiplap became popular in farmhouse interiors, the treatment is available in many interpretations.
Consider vertical shiplap, natural wood, or warm neutral paint colors for an inviting, timeless look.
Where I love using it: casual living rooms, bedrooms, mudrooms, and coastal-inspired spaces.
Designer tip: Choose a board width that complements the scale of the room. Natural wood or a warm off-white can introduce texture without competing with the rest of your décor.
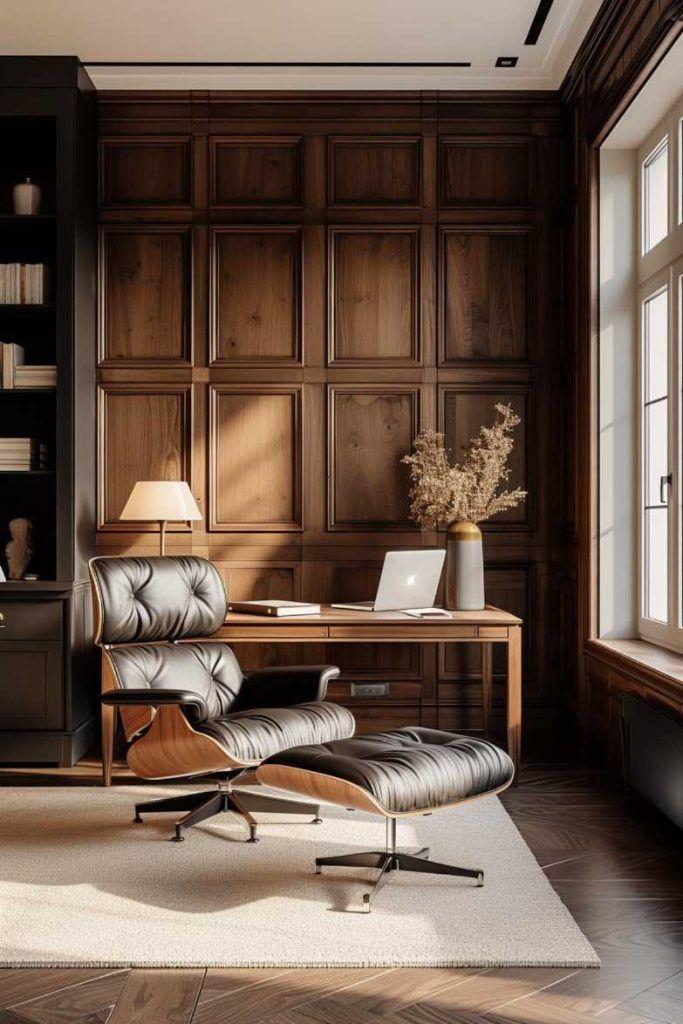
6. Recessed or Shaker-style paneling
Flat-panel, or recessed-panel, millwork offers a restrained approach to traditional paneling.
It creates a framed look using simple rails and stiles, with the central panel set back or visually recessed.
The result is well suited to both traditional and contemporary interiors.
Where I love using it: home offices, bedrooms, dining rooms, and transitional living rooms.
Designer tip: Simple profiles work beautifully with natural materials like oak, walnut and stone.
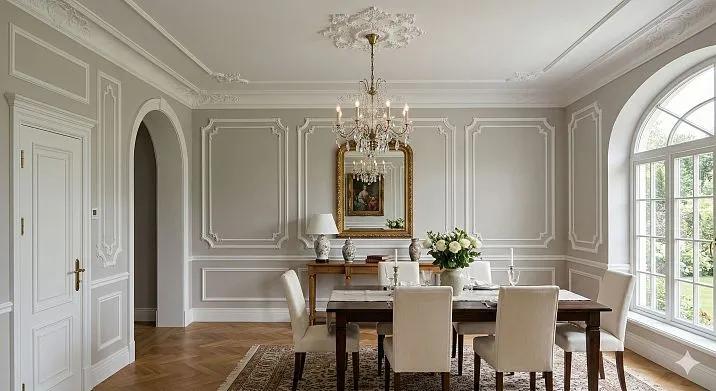
7. Layered millwork: For a refined, historic look
For those who love the elegance of European interiors, layered millwork can create additional architectural richness.
This approach combines multiple decorative details, such as picture-frame molding, chair rails, baseboards, crown molding, and built-up trim profiles.
Where I love using it: formal living rooms, libraries, dining rooms, and primary bedrooms.
Designer tip: Choose one architectural style and carry its proportions throughout the home. More detail isn’t necessarily better; the goal is to make the room feel cohesive.
DIY Tutorial: How to create your own picture-frame molding wall
Picture-frame molding is an accessible way to introduce wall millwork without constructing complete wood panels.
For this project, we’ll apply decorative trim directly onto an existing finished wall and paint everything the same color.
![[Before-After] Miga Wainscoting Molding Wall Decoration](https://images.openai.com/static-rsc-4/yxzk5Czl3ry6gAn7OJe0nPW7-XBjB0lJtZadyRTRk65BYELULEZtysMNo_kzhRPmnX2xT2BNlNO65H02j8AwR4iQpu-budwJEDSBZKLxmJEHQwe_2VwUx2m1wD2UgHGXvEJIAEyUsKOPMsOYA8RPaP3CWP35UAwvUaaWdjUG6pM?purpose=inline)
Step 1: Gather your materials
DIY project shopping checklist
Copy supply list
For a polished, traditional look, I would choose decorative trim approximately ¾ to 1¼ inches wide, depending on the room’s proportions.
MDF, finger-jointed pine, and solid wood are common choices for paint-grade molding. Follow the manufacturer’s instructions for installation and priming.
Step 2: Measure your wall and plan your layout
Before cutting anything, measure the full width and height of your wall.
Take note of outlets, switches, doors, windows, furniture placement, and existing baseboards.
Example panel-wall layout
Three equally sized columns of upper and lower frames. The small gaps around the frames create consistent visual rhythm.
For this example, allow a 6-inch side margin and 4-inch gaps between the three columns.
The calculation is:
144 − 12 − 8 = 124 inches of usable panel width.
Divide 124 inches by three, and each frame’s outside width will be approximately 41⅓ inches.
My designer advice: Use painter’s tape to outline the panels before buying or cutting all your molding. Stand back and view the wall from the doorway. Adjust the proportions until they feel right.
 Step 3: Calculate for waste
Includes approximately 15% extra for cuts and waste. Assumes one row of identical rectangular frames, measured to their outside edges. Round up to available stock lengths and check your cut layout before purchasing.
Step 4: Cut your molding at 45-degree angles


Each rectangular frame needs four pieces of molding:
Two vertical pieces
Two horizontal pieces
Cut opposing 45-degree miters so the corners come together neatly.
Measure all pieces consistently from the outside points of the miters and account for the molding width.
Before installing, arrange the pieces on a flat surface to check that the corners fit together correctly.
Always follow your saw manufacturer’s safety guidance and wear appropriate protective equipment.
Step 5: Mark your wall and install the molding
Using your measured layout, mark each panel’s placement lightly in pencil.
Start with the top horizontal piece of your first frame. Check that it is level before moving to the remaining pieces.
Apply an appropriate construction adhesive to the back of the molding. If using brad nails, verify that you can fasten safely without striking hidden wiring or plumbing, and use suitable backing or fastening methods for your wall.
Install each section carefully, maintaining consistent gaps.
Continue until all your frames are complete.
Step 6: Fill, caulk, sand, and paint


This is the part that makes all the difference.
Fill nail holes and imperfect miter joints with suitable filler. Once dry, sand the filled areas smooth.
Use paintable caulk where the trim meets the wall, following the product’s application and curing instructions.
Prime as needed, then paint both your molding and wall.
For the most cohesive look, I recommend using the same color on both surfaces, with compatible finishes.
Stand back and enjoy the architectural character you’ve added to your home!
Choosing the right millwork for your space
Not every room requires elaborate paneling. The best design is one that feels connected to the home’s architecture and its everyday use.
Your design style | Millwork to explore |
|---|---|
English cottage | Beadboard and simple wainscoting |
Traditional or vintage | Picture-frame and raised-panel molding |
Modern farmhouse | Board and batten or shiplap |
Dark academia | Dark wood paneling and layered molding |
Organic modern | Simple flat-panel molding |
French-inspired | Full-height picture-frame molding |
Final thoughts: A little detail makes a beautiful difference
One of the things I love most about interior design is that you don’t have to completely renovate your home to make it feel special.
Adding architectural character through millwork is a beautiful way to create a more finished, intentional space. Even a single wall can transform the atmosphere of a room.
Whether you choose delicate picture-frame molding, charming beadboard, or a more substantial paneled treatment, the key is thoughtful proportion, careful installation, and a finish that complements your home.
At Jade & Sage, I believe a beautiful home should be personal, timeless, and achievable.
Create a home that feels grounded, storied, and uniquely yours.
Happy Decorating!
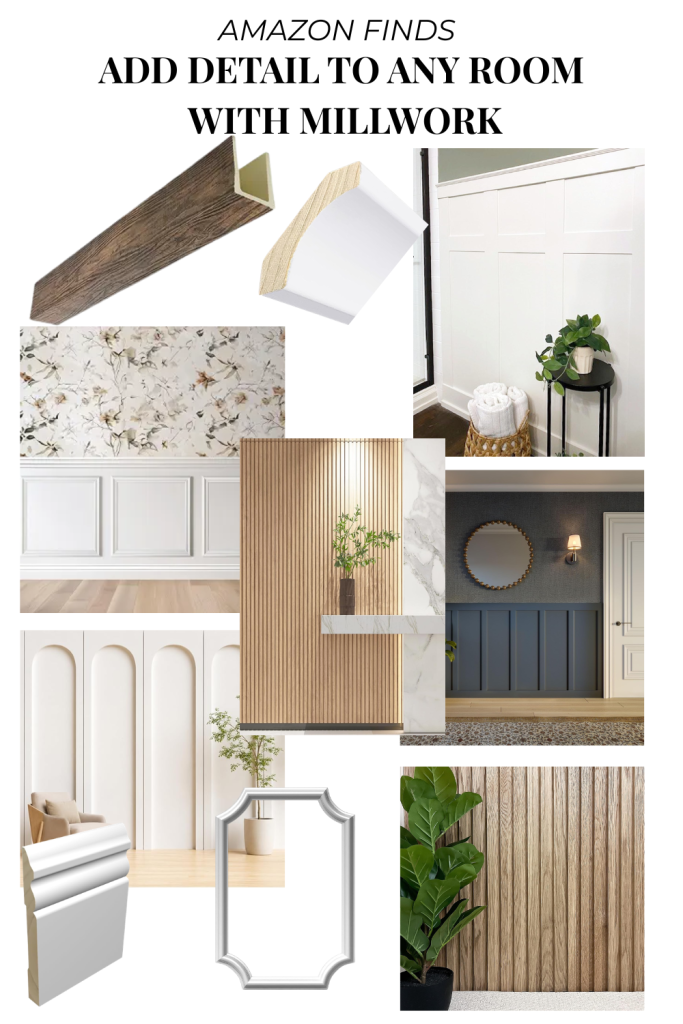
I’ve curated a shop the board with millwork design items and supplies you will need to install your very own millwork wall detail. HERE

Check out our Virtual Design Services. HERE